Tips for beginner bird photographers and beyond
My subject, the short-eared owl, was nowhere in sight. I settled beside a stream. Golden light kissed the grasses, reflecting silver and pink off the water. I grew aware of my surroundings. A serenade of peepers and red-winged blackbirds filled the evening air.
Several yards away, a large snapping turtle lumbered towards the water. I watched him step by step, loafing forward, his snout still covered in muddy old leaves. He reminded me of how I felt on a weekday morning, pulling myself from my bed making my way towards the coffee pot. Eventually, he entered the water. I could almost see his relief.
It must be an odd thing, I thought, to exist as wildlife. There are no unnecessary tasks. No distractions. Just survival.
The blackbirds drew near. I observed the grasses, the colors behind them, and the direction of the light. I observed how their bodies contorted in response to their calls. The way they fluffed and shook, and I waited.
Eventually, one landed close by. I gave him a moment to settle. Once he busied himself with his song, I lifted the camera to frame the shot.
Storytelling in Bird Photography
Photography as an art is storytelling with images through your lens. In other words, it is showing us how you see the world!
Storytelling in bird photography means exactly that: using images of birds to tell a story. The story could be a scene, a behavior, the way a species lives, or a moment. It is the difference between a flat image and an image that stands out. It is an image that evokes feelings in the viewer, such as empathy, excitement, mystery, joy, or sadness.
It adds depth to your photography.
With modern-day social media algorithms driving what goes viral and what does not, it is easy to get caught up in “getting the shot everyone wants” or tailoring your style to what gets likes.
For example:
- tight portraits > wide-angle wildlife shots
- trending presents > delicate thoughtful editing
- big game species > “underrated species in a new light.”
I am not hating on tight portraits or presets at all. In fact, I think they are all wonderful ways to showcase wildlife if they are authentic, ethical, and you are not sacrificing your own creative vision.
However, when our images are being imprisoned by this mentality, it becomes a death trap for creativity and storytelling. In fact, I would argue that now more than ever, we need independent thinking in photography. People who are not afraid to show their unique style or perspective on the world.
The process can be quite complex, and the more experience the photographer gains, the more complex it can be. The good news is that if you are a beginner, you don’t even need an expensive telephoto lens to tell a good story with your bird photography. ( see below where I highlight “environment photos!)
You do, however, need a good eye, an understanding of how to work with light and composition, and familiarity with your camera setup. For some people, artistic eye comes easily, while others have to work at it more. For some, it’s the technical side of photography that is the challenge.
Both can be learned, but it does take time, dedication, and commitment for active learning. Want to train your eye? Get out and just go for a slow walk. Take long pauses. Study the landscape from a broad perspective and then from a narrow one. Notice elements like color, light, shapes, and shadows. The more you do this, the better your eye “skill” will develop.
Technical knowledge can be overwhelming, and it never ends. If you approach this side of photography step by step, feature by feature, and skill by skill, it can become a very enjoyable experience.
As someone who began photography in the film days and returned from a long hiatus to a digital world, I was lost, frustrated, and felt like I would never understand how to use this new technology. Thankfully I had a mentor to help me along the way, as well as other kind souls with a camera, and my own “assigned homework.”
Every week I committed to learning one new skill, whether it was in the camera or post processing, such as a feature in Lightroom, I would sit down, watch YouTube tutorials, and practice.
Not too long after, I found myself discussing megapixels, histograms, and aperture with other photographers. I went from dreading technology to full-on geeking out, and although it is not my favorite part of the art, I do enjoy it.
What you need
More and more people are asking me how they can get into wildlife and bird photography! This is so exciting, and whether you are thinking of taking it to the next level or keeping it as a hobby, I can promise that bird photography will change your life.
Here is a starter list of what I recommend for beginners:
- Love for your subject. In my opinion, this IS the most important ingredient in wildlife photography. Bird photography is rewarding but also incredibly challenging. Having the patience, dedication, and commitment comes much easier when you love your subject. An interest and passion for your subject will also motivate you to learn about the species, maybe even advocate for them once you begin sharing your photography. There is also something intangible you can see in a photographer’s work when they love their subject- it just shows. So if you already love birds, this is a great start AND the key that will keep you going!
- A camera, lens, battery, and memory card. This seems like an obvious recommendation, but this is the question I get the most: “What setup do I buy?” My answer for beginners is “ whatever you can afford!” In all seriousness, photography can be an expensive venture, especially once you get into niche lenses and additional equipment such as tripods, specialized remotes, or anything else for the field. Start with something basic that you know you can get the hang of. My first digital camera was a Canon EOS M50. I used the stock lens it came with for almost a year before I began to invest in any serious glass. I learned how to use the “exposure triad,” practiced, and then decided if I wanted to invest more. I knew without a doubt I wanted to continue, and that is when I decided to invest. There is a saying, “all the gear and no idea.” At the end of the day, it is not the camera that takes the shot, it’s the photographer. My advice is to work on your skills first before you drop your life savings into a setup.
- An established workflow. A workflow is what you do with your pictures after you take the photograph. You want to establish an immediate workflow with your pictures so they do not become thousands of unnamed photos just floating aimlessly on your hard drive. TRUST ME ON THIS.
The key is to establish a workflow that works for you. If you ask a hundred different photographers, they might all answer differently. Repeat your workflow every single time so it is automatic, which brings me… to the next one, backing up.
- A backup system. Imagine this. You have an incredible session of photographing Cedar Waxwings. You download the photos, edit them, and export them. The next day, your hard drive crashes or your external drive goes missing. No backup. Devastating. A backup system ensures that no matter what, the images that you worked hard for exist somewhere. The rule of thumb is to back up three times. I like to use SSD drives such as this one for my backups: SanDisk 2TB SSD
- An understanding of the exposure triad: aperture, shutter speed, and ISO. This could be an entire blog post on its own, but understanding light and how to use these three camera settings is the foundation. Think of your camera as your assistant. You see something, a moment you want to capture. Your job is to set your camera so that it knows what image you want to create.
- An understanding of how your camera performs with this triad. Every camera and lens has a sweet spot, a place where it performs best. Some setups work best in bright light and perform poorly in low light. Some lenses require more aperture tweaking at their longest focal length. Almost every camera has its “downfalls. There is no perfect solution to every situation, but remember that it falls to you, as the photographer, to learn how to communicate with your camera. For years, I shot birds in flight with my old EOS body. There was no wildlife tracking, no eye detection, and I even continued for months after water damage destroyed the autofocus. I managed to still take good photos. Yes, it was ALLOT more work and time, but I knew my gear, I knew my triad, and I loved my subject!
- A good sense of humor and patience. No matter your goals, professional or hobby, bird photography should be FUN. The moment you are no longer enjoying it, walk away, take a break, photograph something else, or do nothing at all. The more time you spend photographing birds, the more “funny” things will happen to you. Be patient. Laugh. Have joy with it and for the love of birds, have fun!
Eventually, it is a good idea to invest in a designated camera bag. I have been through a lot of bags, and I can be rough with things. I wanted a good quality, durable camera bag with storage that made sense. The last thing you want to be doing is fumbling around in one big pocket for a memory card.
That is when someone recommended Think Tank Bags. I couldn’t be happier with my Backlight 26L for both the field and travel. It comfortably holds two camera bodies, a telephoto lens, a wide-angle lens, and everything else I need. Not to mention, it is a beast and has held up in crazy Arctic storms and hikes like no one’s business.
Here is my affiliate link for your browsing: The best photography bags.
Furthermore, they are made in the USA and have great customer service!
Three bird shots that tell a story
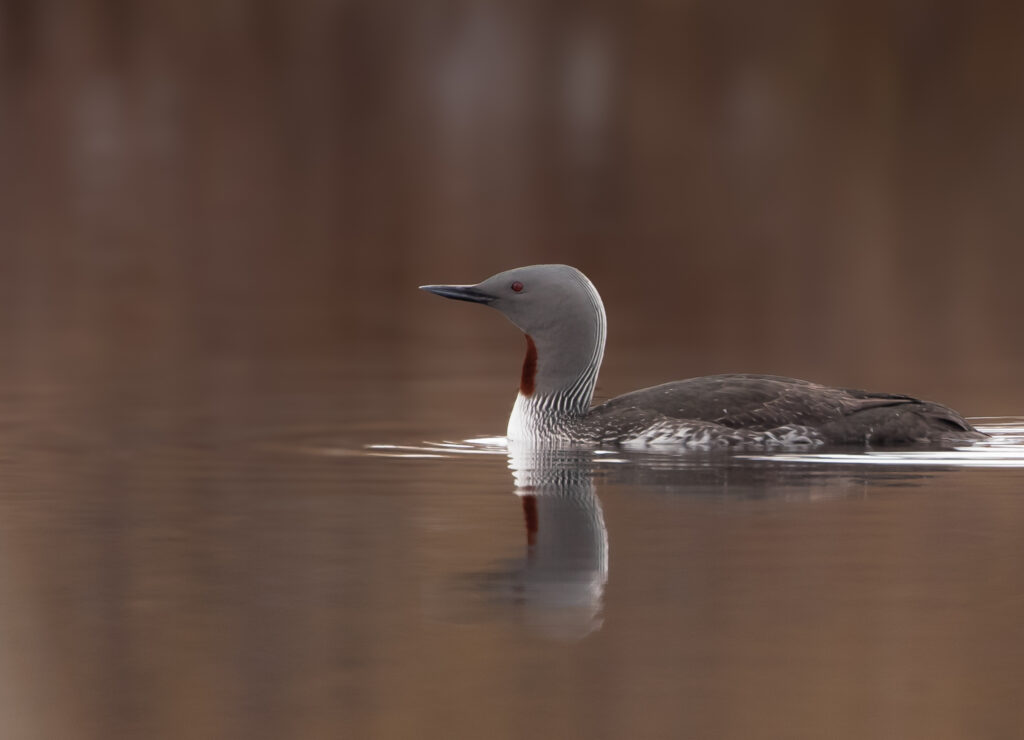
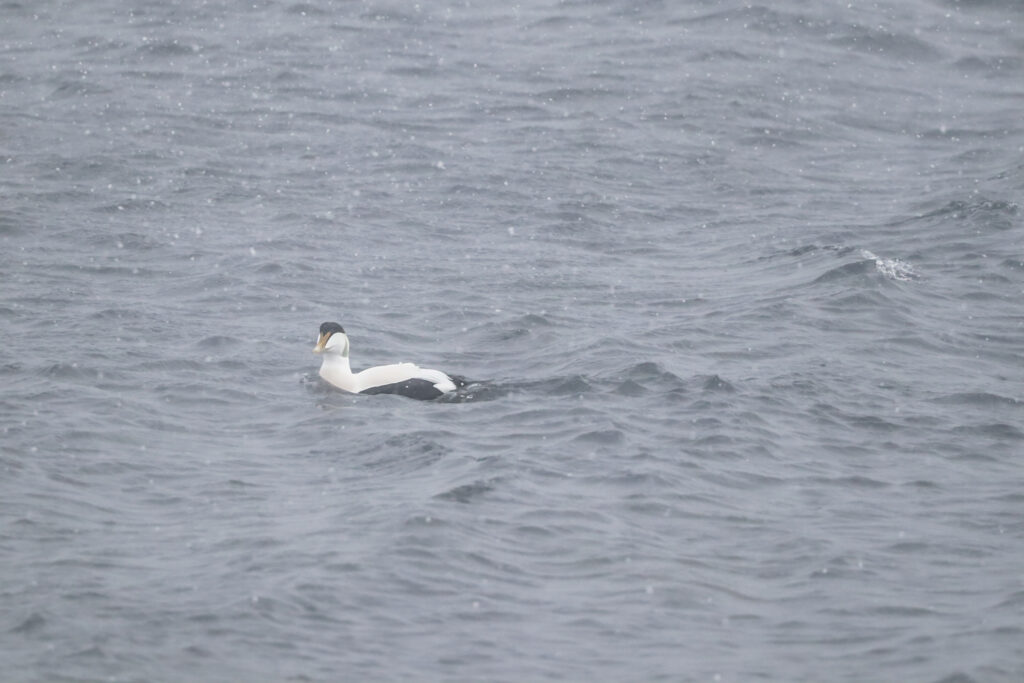
The portrait
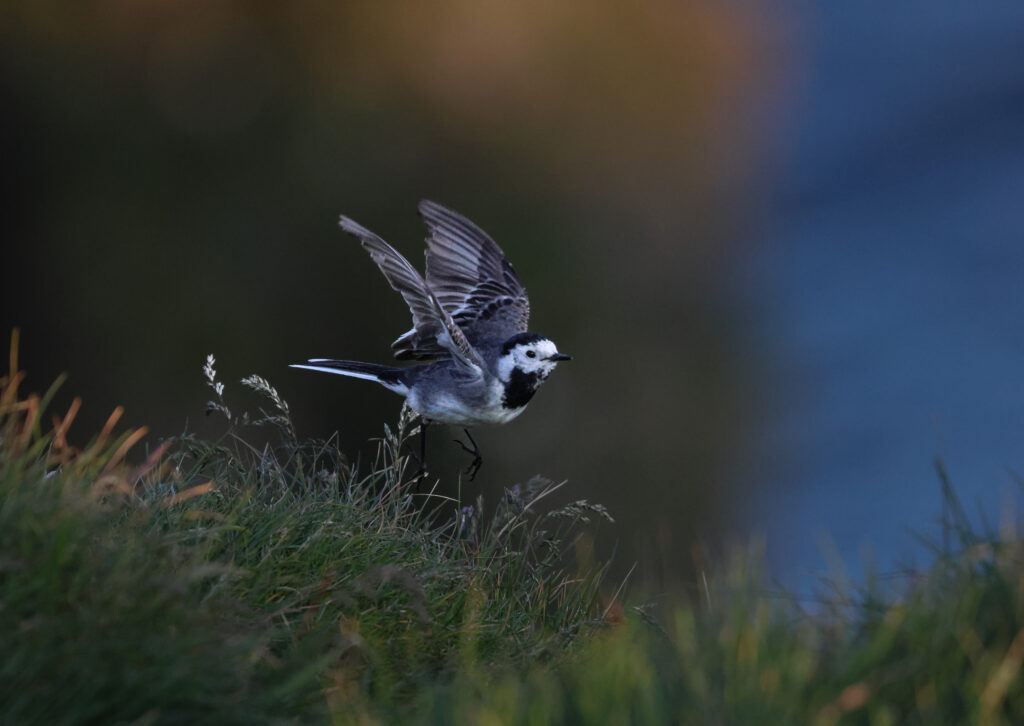
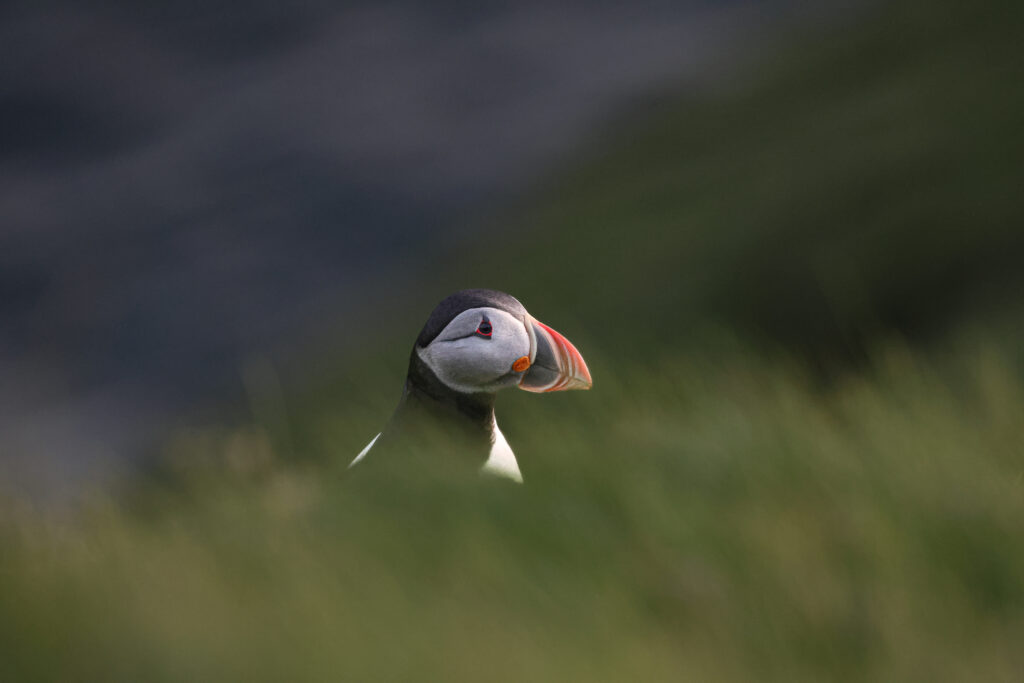
The portrait is very popular. Think feather detail, striking color, a bird’s eye, a bird filling the frame. In a portrait, the bird is the centerpiece with no distractions. A portrait is a striking way to create impact in bird photography. For a bird portrait, you will need a telephoto lens, a narrow aperture such as f/5.6- 8.1, and minimal negative space to frame your bird.
Feelings evoked: Brilliance. Awe. Beauty. Stunning. Mystery. Empathy
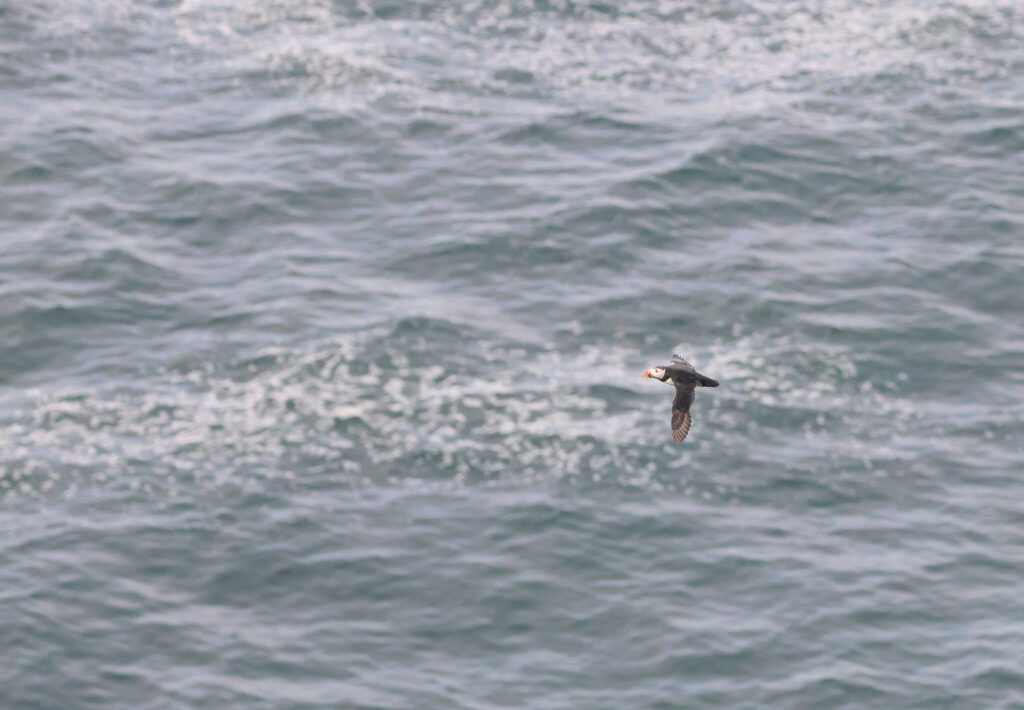
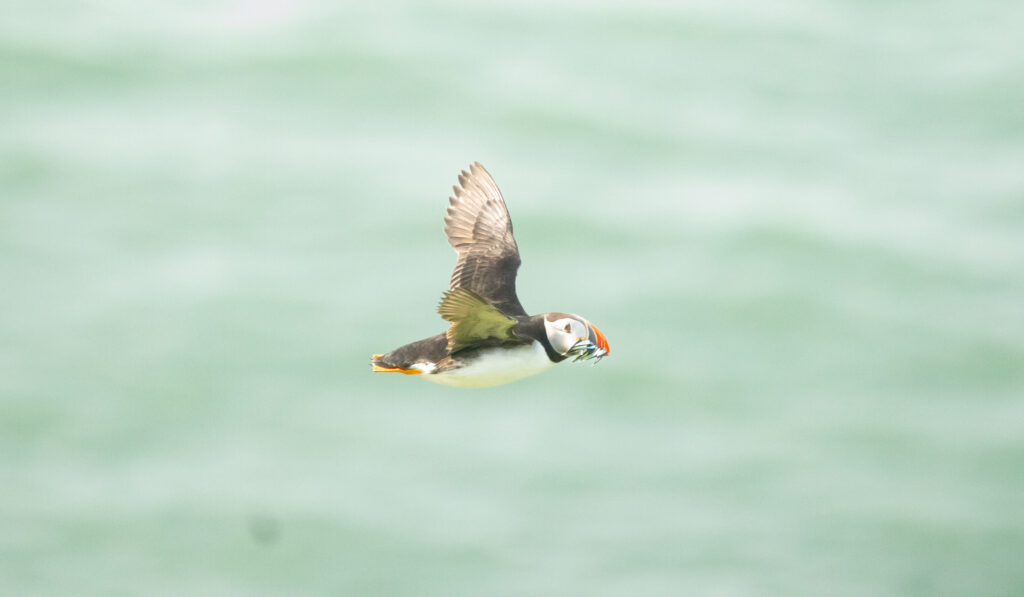
Action
Photographing birds in action is one of the most exhilarating and challenging parts of bird photography. Birds move fast, and we don’t always get to choose the light, situation, or location in which this happens. My recommendation for beginners is to start with backyard birds, gulls, or hummingbirds.
Hovering hummingbird moments are much more forgiving than, let’s say, trying to photograph a very small, agile species such as tree swallows. Gulls are also great subjects for practice, as they are larger and easier to track.
When you are photographing birds in action, remember to focus your attention on the bird’s eye. Most modern-day high-end cameras come with an “eye tracking” feature, which makes this much easier.
Switch your camera settings to the following:
Servo/ Burst Mode/ Continuous High Speed Shutter/ Wildlife Tracker enabled ( if applicable)/ Focus on Area around subject. Do NOT use single-point focus, as it won’t keep your camera focused on the bird if it moves away from that point.
Shutter speeds:
Small birds ( songbirds/ hummers): 1/ 2500-4000
Medium birds ( gulls/ puffins) 2000-3200
Large birds ( Bald eagles/ Great blue heron) 1600- 2500
Feelings evoked: excitement, joy, wonder, adventure, anticipation
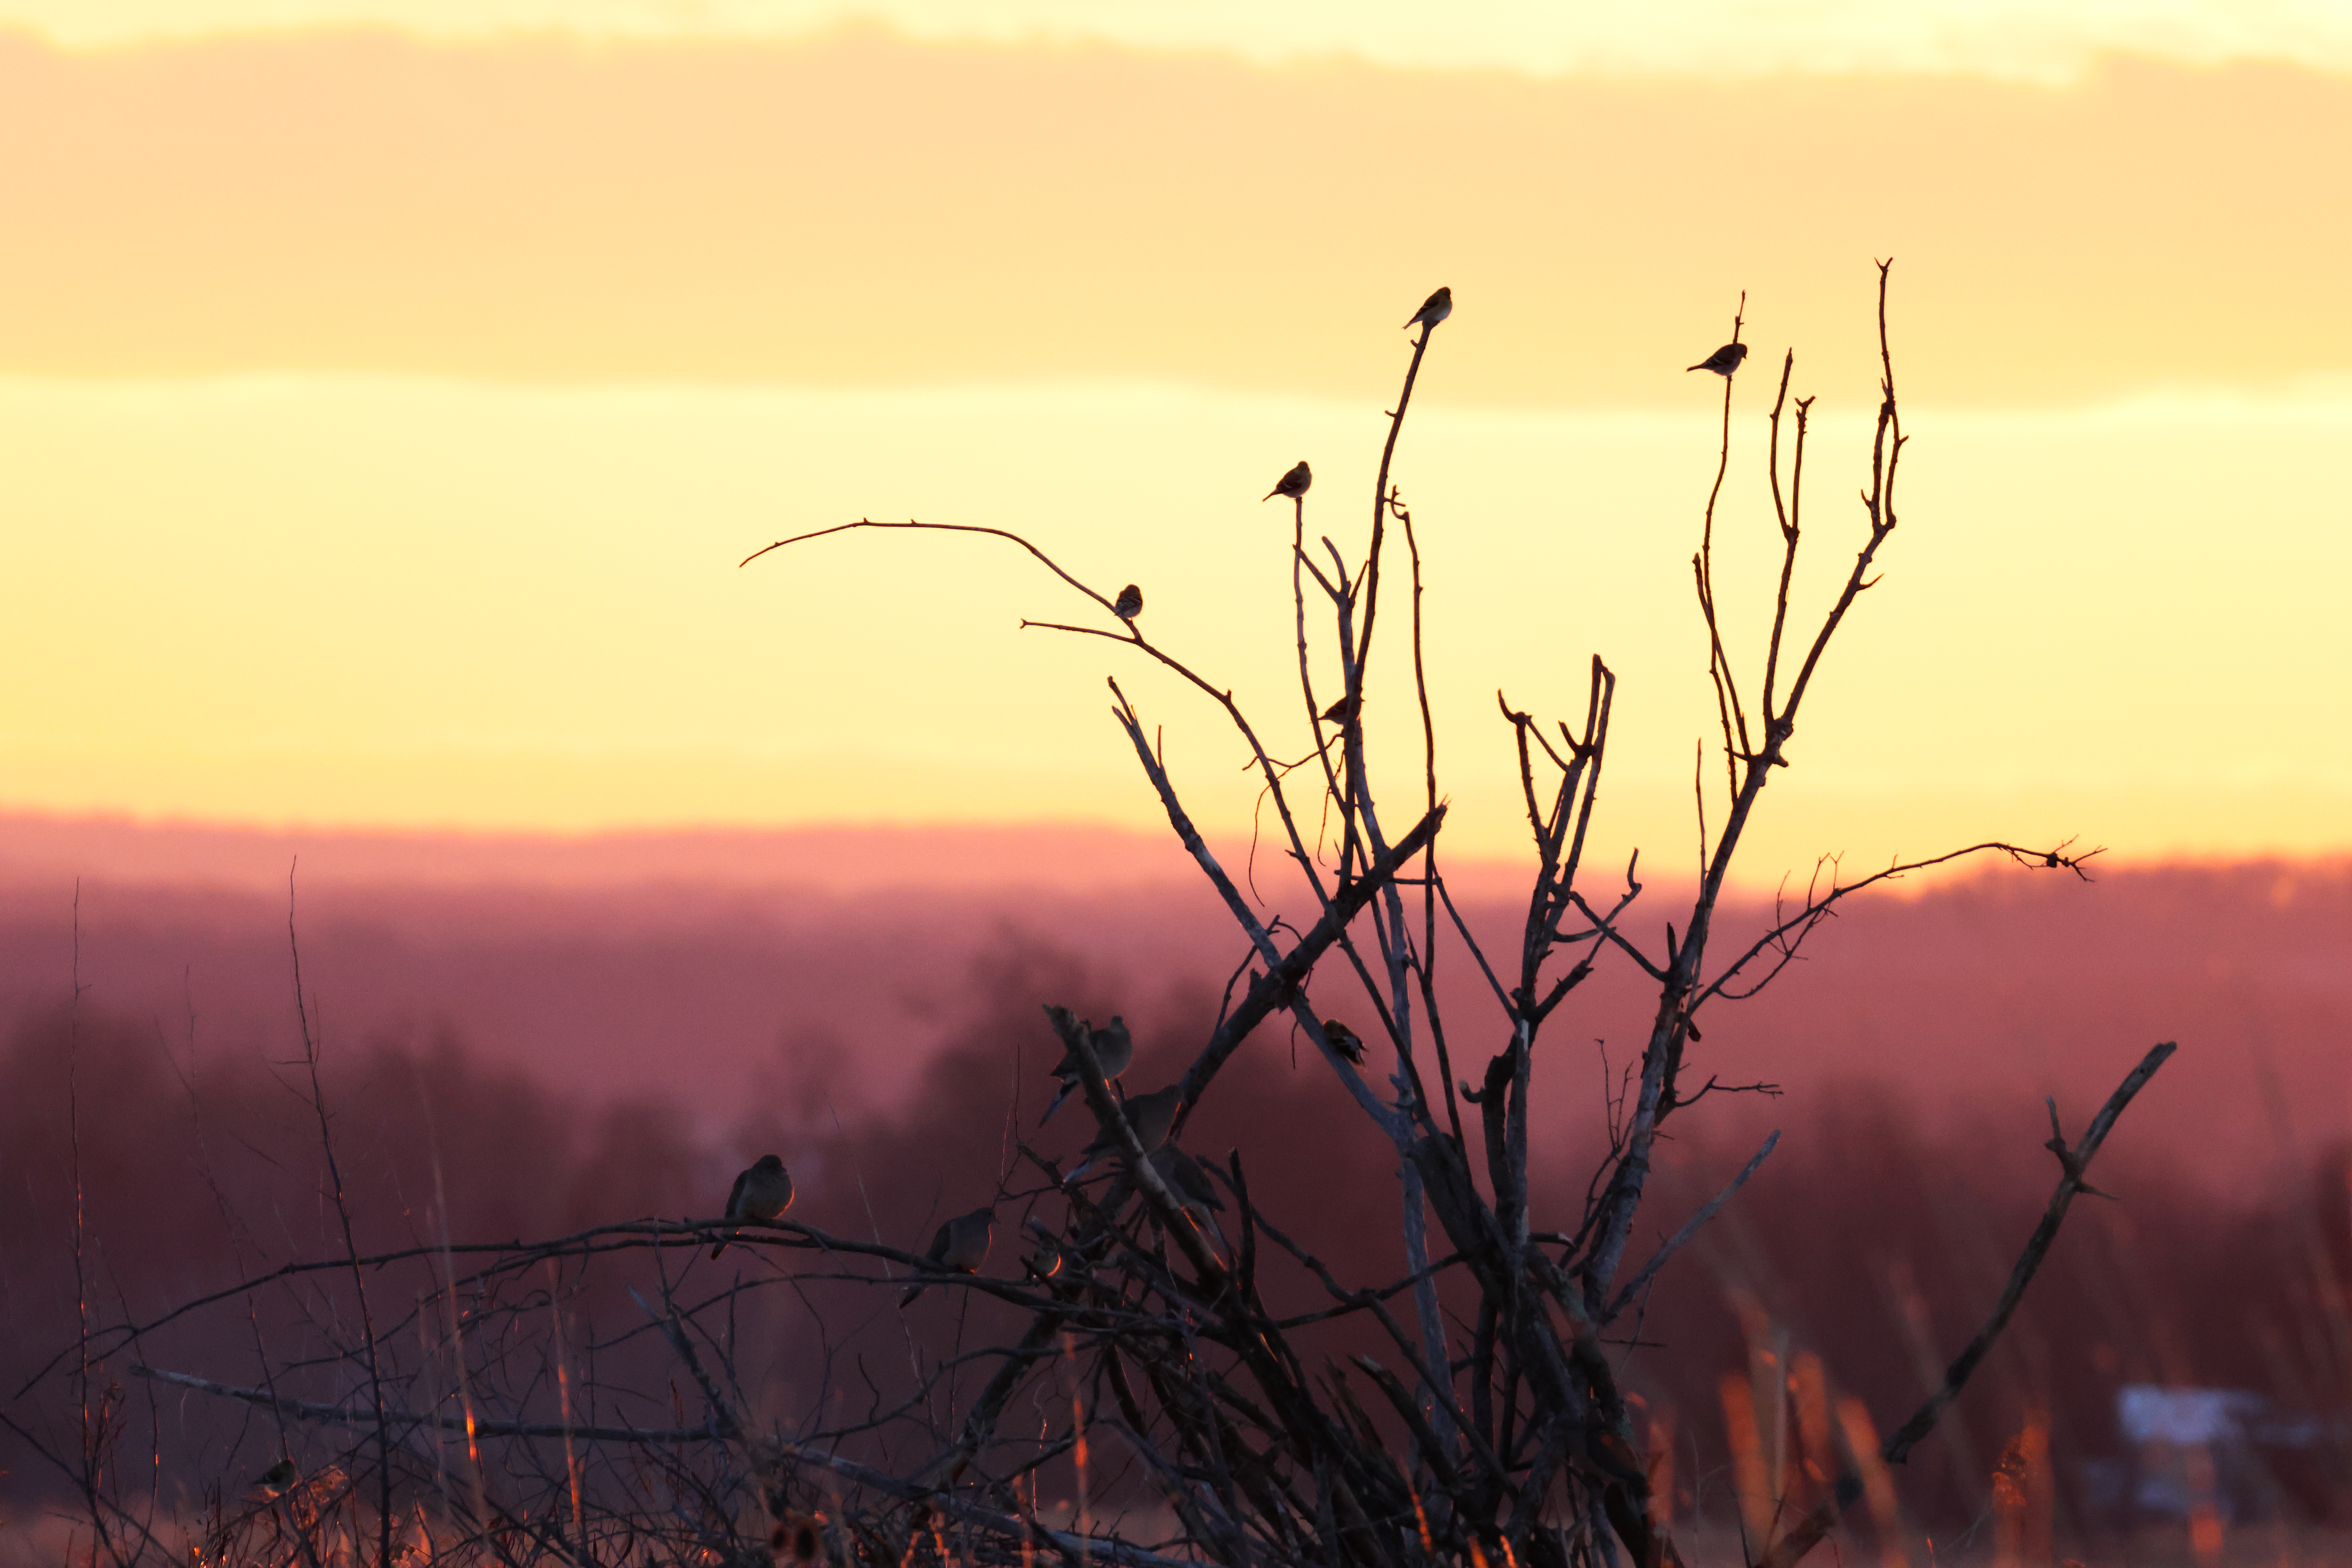
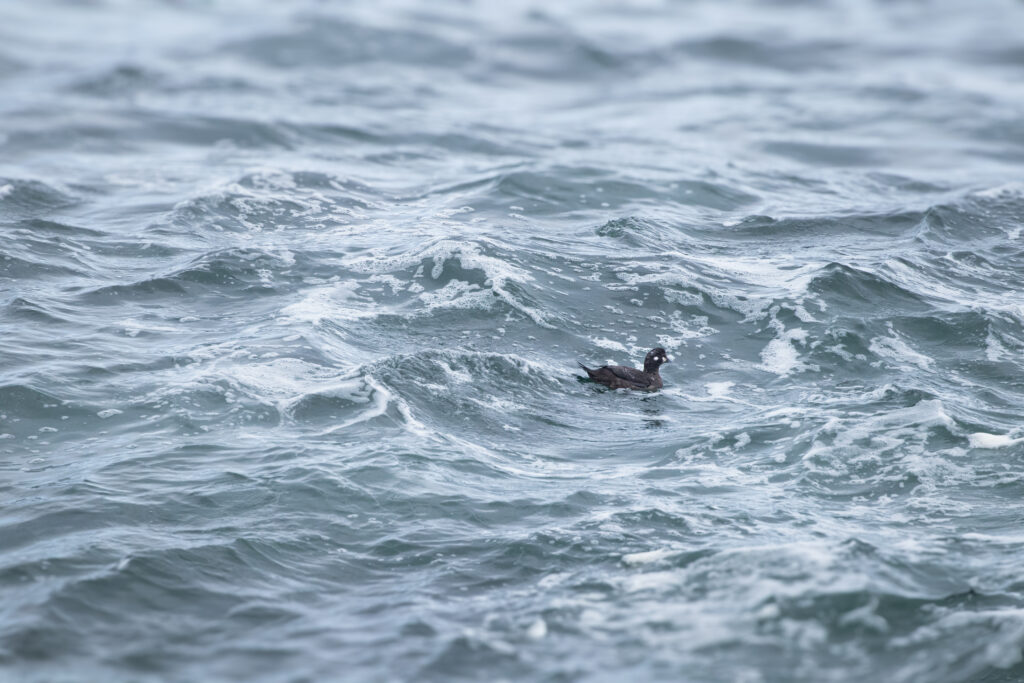
The environment
For me, this is the most underrated shot: the bird in its environment.
I LOVE wide views of a landscape with a bird or birds in the picture. Thoughtfully composed, these images make a huge impact on the viewer, and here’s why:
- Birds exist in so many beautiful spaces. They fly through the air, sing on the grasslands, climb trees, wade in marshes, perch on branches, and float by the shoreline. Images that include the landscape with the bird tell a story of migration, resilience, survival, and what makes wildlife wild.
- Birds are in danger, mostly due to habitat loss. Since 1970, North America has had a net loss of over 700 million birds, according to data shared by The Wildlife Society. When you show us the environment, you are sharing the beauty of the bird’s habitat. You are, in essence, an advocate.
The neat thing about this style of photograph is that you do not need a telephoto lens, but you will need a good eye and a knowledge of your species aka where do they hang out?
For wider bird shots, you will want to stop down your lens to a narrow aperture to ensure the entire picture is in focus (f/8-f/11). Widen your auto focus tracking and decide how much landscape you would like in your photo, and where your bird appears.
Look for any leading lines in the frame to help you determine your image composition, such as a horizon, a tree, a shoreline, or any other landscape features.
Feelings evoked: Wonder. Empathy. Beauty. Awe. Appreciation. Advocacy.
Time to get out there and….find some birds!
If you are lucky like me and live in a very “birdy” area, your best way to find birds is to stay local. Use apps like ebird to locate and find bird species near you.
Start within a one-hour radius and do a search. You can also search by species and even set up “Rare Bird” alerts for your area that are delivered to your email daily.
Another way to find birds is to Google wildlife refuges near you or birding groups or organized walks.
Learn about the species you photograph. What are their migratory patterns? Breeding life? What do they eat, or what other behaviors are characteristic of them? This will not only help you find birds but also inspire your bird photography.
Remember to enjoy the experience and your photography. Stay true to your own creativity and style, stay ethical, and remember to be as joyful as a bird in flight!